How To Set Task-Specific Alerts for Better Focus
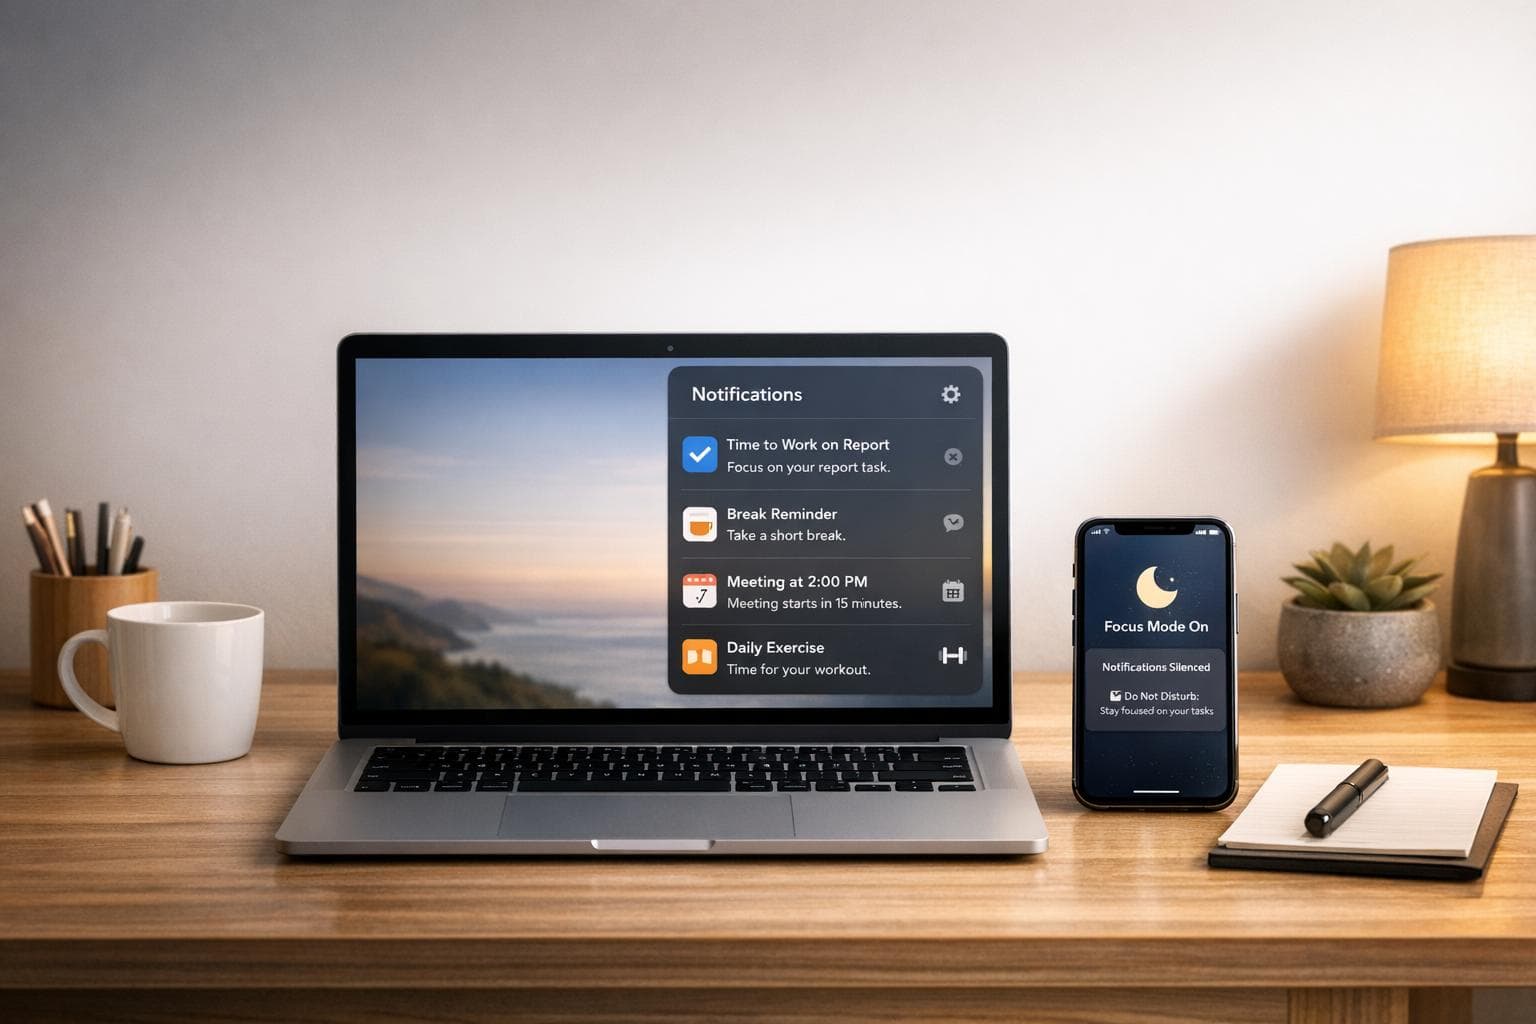
How To Set Task-Specific Alerts for Better Focus
Managing notifications on macOS is key to staying focused. Task-specific alerts let you block distractions and prioritize only the notifications you need. Using macOS tools like Focus modes, time-sensitive alerts, and automation, you can customize how and when notifications appear. Here's how you can make it work for you:
- Focus Modes: Create profiles (e.g., Work, Study) to allow only specific apps and contacts to notify you. Sync these modes across devices for seamless management.
- Time-Sensitive Alerts: Ensure critical notifications, like meeting reminders or urgent messages, bypass Focus modes.
- Automation: Schedule Focus modes by time, location, or app usage to activate them without manual input.
- Notification Customization: Adjust alert styles (None, Banners, Alerts) for individual apps to control interruptions.
How I Automate Focus Modes on macOS Using Calendar Events
macOS Notification Settings Explained
macOS gives you two ways to manage notifications: system-wide controls and app-specific settings. System-wide controls let you manage how notifications behave across your Mac. For example, you can decide whether alerts show up when your screen is locked, when your Mac is asleep, or when you're sharing your screen during a presentation. On the other hand, app-specific settings allow you to tailor notifications for individual apps, so you can prioritize what’s important and minimize distractions.
Using these controls strategically can make a big difference. For instance, you might want to mute all notifications during a meeting using system-wide settings, while still allowing critical alerts from specific apps through app-specific options. As Aliya Chaudhry from The Verge points out, "Notifications that pop up on the corner of your Mac's screen can be really helpful... But when you've got a deadline or are in the middle of something, notifications for every message or email can be distracting or even annoying". Let’s look at how you can quickly access and customize these settings to fit your needs.
How to Access Notification Settings
Finding your notification settings is straightforward. Start by opening System Settings from the Apple menu, then navigate to Notifications. Alternatively, you can open the Notification Center by clicking the date and time in the top-right corner of your screen. From there, click the arrow and three-dot icon next to an app to adjust its notification preferences directly.
Customizing Alerts for Your Work
Once you’re in an app’s notification settings, you’ll find plenty of options to fine-tune how alerts behave. The Alert Style setting lets you choose how notifications appear:
- None: Blocks notifications entirely.
- Banners: Displays temporary alerts that disappear automatically.
- Alerts: Keeps notifications visible until you dismiss them.
For apps like your calendar or task manager, persistent Alerts can help ensure you don’t miss critical updates. For less urgent apps - like news or social media - you might prefer temporary Banners or even disabling notifications altogether.
You can also adjust other settings, such as toggling Dock badge icons, enabling or disabling notification sounds, and choosing how notifications are grouped. Additionally, you can decide whether previews of notifications are shown Always, When Unlocked, or Never, giving you more control over your privacy.
How to Set Up Focus Modes
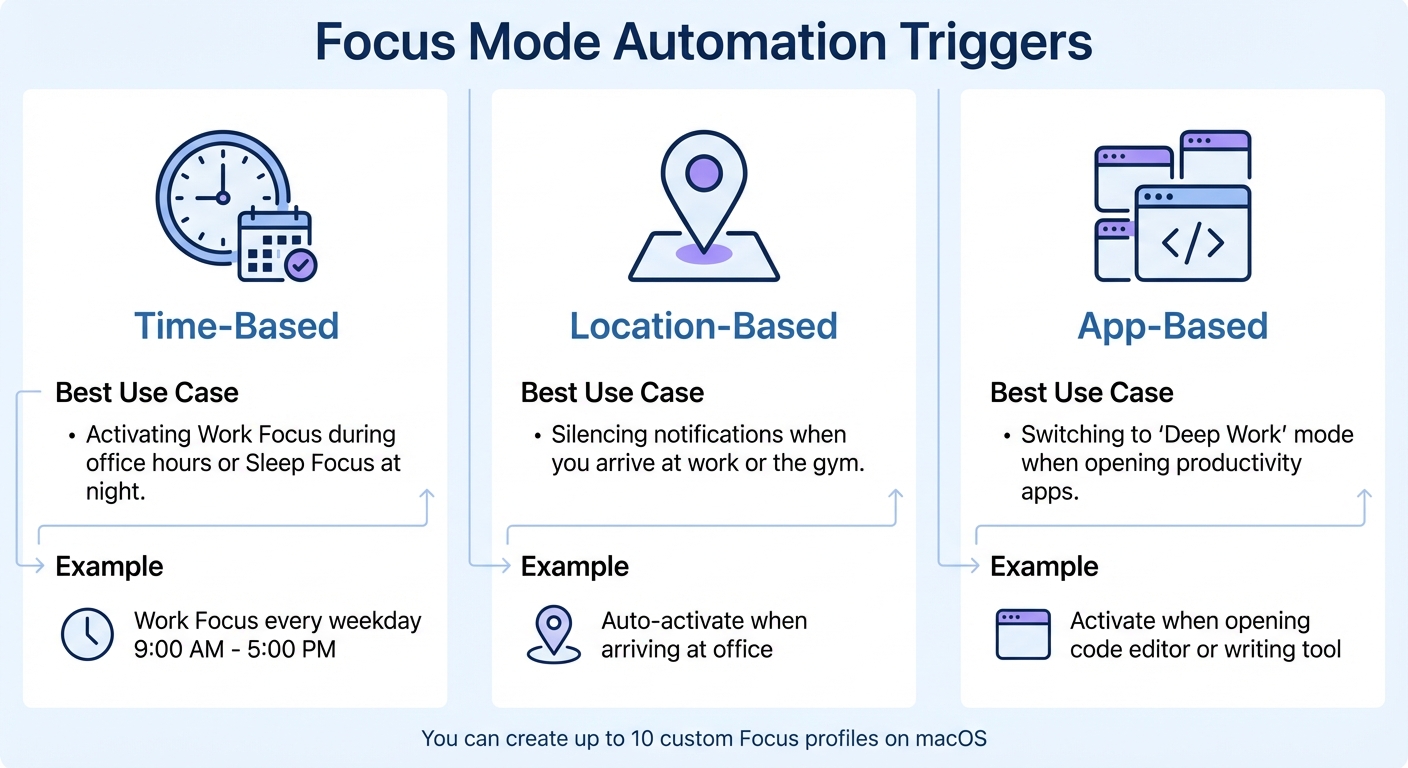
macOS Focus Mode Automation Triggers Comparison
Focus modes are a great way to manage notifications based on what you're doing. Instead of constantly tweaking settings for each app, you can create profiles that automatically allow only the notifications you need. These profiles help reduce distractions and keep you in the zone. As D. Griffin Jones from Cult of Mac describes it:
"Apple's new Focus feature is like Do Not Disturb on steroids".
To get started, open System Settings and select Focus from the sidebar. Apple provides some preset options like Work, Sleep, and Gaming, but the real magic happens when you create your own custom modes. Click Add Focus, then choose Custom. You can name it something like "Deep Work" or "Study" and even pick a unique color and icon to make it stand out. Once that’s done, follow these steps to fine-tune your custom Focus mode.
After setting up a Focus mode, decide which contacts and apps are allowed to interrupt you. Under People, you can either create a whitelist by selecting Allow Some People or block specific individuals with Silence Some People. You can also tweak call settings, allowing calls from Favorites or Contacts Only. If needed, enable Allow Repeated Calls so that a second call from the same person within three minutes can come through - handy for emergencies.
For apps, the process is similar. Use Allow Some Apps to select only the tools you need, like your work messaging app or calendar. Turn on Time Sensitive Notifications to ensure urgent alerts - like delivery updates or security warnings - still get through, even if the app isn’t on your allowed list. Apple’s system uses contextual intelligence to ensure only the most critical notifications interrupt you.
Creating Custom Focus Modes
Focus modes aren’t just about blocking notifications - they can also help optimize how apps function during specific tasks. For example, you can set Safari to show only work-related tabs or configure Mail to display just your work email, keeping personal messages out of sight. These tweaks make it easier to stay organized and avoid distractions.
You can create up to 10 custom Focus profiles on your Mac, so think about setting up modes for different activities - like creative work, meetings, exercise, or even your morning routine. Each mode can have its own icon, color, and permissions for apps and contacts. Plus, enabling Share Across Devices ensures your Focus modes sync seamlessly between your Mac, iPhone, iPad, and Apple Watch. Once synced, activating a mode on one device silences notifications across all of them. You can even automate these modes to fit naturally into your daily schedule.
Automating Focus Modes by Schedule
While you can manually toggle Focus modes, automation makes everything much smoother. In the settings for any Focus mode, click Add Schedule to create triggers based on time, location, or app usage.
- Time-based automation is ideal for routines, like activating your Work Focus every weekday from 9:00 AM to 5:00 PM.
- Location-based automation uses GPS to activate a mode when you arrive somewhere specific, like your office or gym.
- App-based automation turns on a Focus whenever you open a particular app, like a writing tool or code editor.
| Automation Trigger | Best Use Case |
|---|---|
| Time-Based | Activating Work Focus during office hours or Sleep Focus at night. |
| Location-Based | Silencing notifications when you arrive at work or the gym. |
| App-Based | Switching to a "Deep Work" mode when opening productivity apps. |
For quick manual adjustments, click the Control Center icon (crescent moon) in the menu bar to switch Focus modes instantly or set a duration like "For 1 hour." Alternatively, hold the Option key while clicking the date and time in the menu bar to toggle Do Not Disturb on or off in seconds.
Setting Up Time-Sensitive and Priority Alerts
Not all notifications are created equal - some demand immediate attention, while others can wait. Time-sensitive alerts, like a "Time to Leave" reminder or a meeting starting in five minutes, require quick action. On the other hand, critical alerts, such as smoke detector warnings or security system notifications, override all Focus modes to ensure you're notified in emergencies. Knowing how to differentiate and manage these alerts helps you stay on top of what's important without being buried under unnecessary distractions.
To enable time-sensitive alerts for specific apps, head to System Settings and select Notifications from the sidebar. Under Application Notifications, choose the app you want to configure - like Calendar or your task manager - and toggle on the Allow time-sensitive alerts option. If you want these alerts to bypass active Focus modes, make sure to enable the Time Sensitive option within each Focus mode's settings. This ensures that critical notifications reach you no matter what.
You can also customize how these alerts appear. For high-priority notifications, set the Alert Style to Persistent, so they stay on your screen until you dismiss them. Additionally, some apps, such as the Home app for security sensors, support critical alerts. Enabling this feature ensures those notifications always come through, even if you're in a Focus mode.
For Calendar, you can activate the "Time to Leave" feature by going to Settings > Alerts. When an event includes a location, macOS uses your current position and traffic conditions to notify you when it's time to head out.
If you need multiple reminders for an event, you can set phased alerts in Calendar. Double-click an event, click the time, and use the Alert pop-up menu along with the plus (+) button to add reminders - for example, one a day before and another 15 minutes before. For tasks requiring specific files, you can even use the "Open File" custom alert to automatically open necessary documents right when you're ready to start working.
sbb-itb-8245ce4
Managing Alerts in Notification Center
After setting up your task-specific alerts, the Notification Center becomes your go-to spot for reviewing and managing incoming notifications. To access it, simply click the date and time in the top-right corner of your screen or swipe left with two fingers from the right edge of your trackpad. Any missed notifications will appear in chronological order.
Notifications from the same app are often grouped into stacks, keeping things tidy. To view all alerts in a stack, click the top notification to expand it. When you're done, click "Show less" to collapse them again. To clear a single notification, click its "X." If you want to clear an entire stack, hover over the top notification's "X" and select "Clear All."
Need to adjust an app's notification settings on the fly? You can do that directly from Notification Center. Click the arrow next to the app's name, then click the "More" button (three dots). From there, you can mute notifications, turn them off entirely, or jump straight to Notification Settings for more detailed adjustments. This shortcut is perfect for quickly silencing a distracting app without interrupting your workflow.
Some notifications let you take action right within Notification Center. For instance, you can click "Reply" on a message or "Snooze" on a Calendar event. For Calendar alerts, holding down the "Snooze" button lets you choose a specific reminder duration, like 15 minutes.
If you're using macOS Sequoia 15 or later, you can enable "Summarize notifications" in System Settings. This feature condenses lengthy or stacked alerts for easier browsing. You can also customize how notifications are grouped: choose "Automatic" to group by app, "By Application" to prioritize the most recent app, or "Off" to remove grouping altogether. These tweaks, combined with the dynamic focus modes mentioned earlier, give you even more control over how you manage alerts.
Using Focusmo for Better Focus
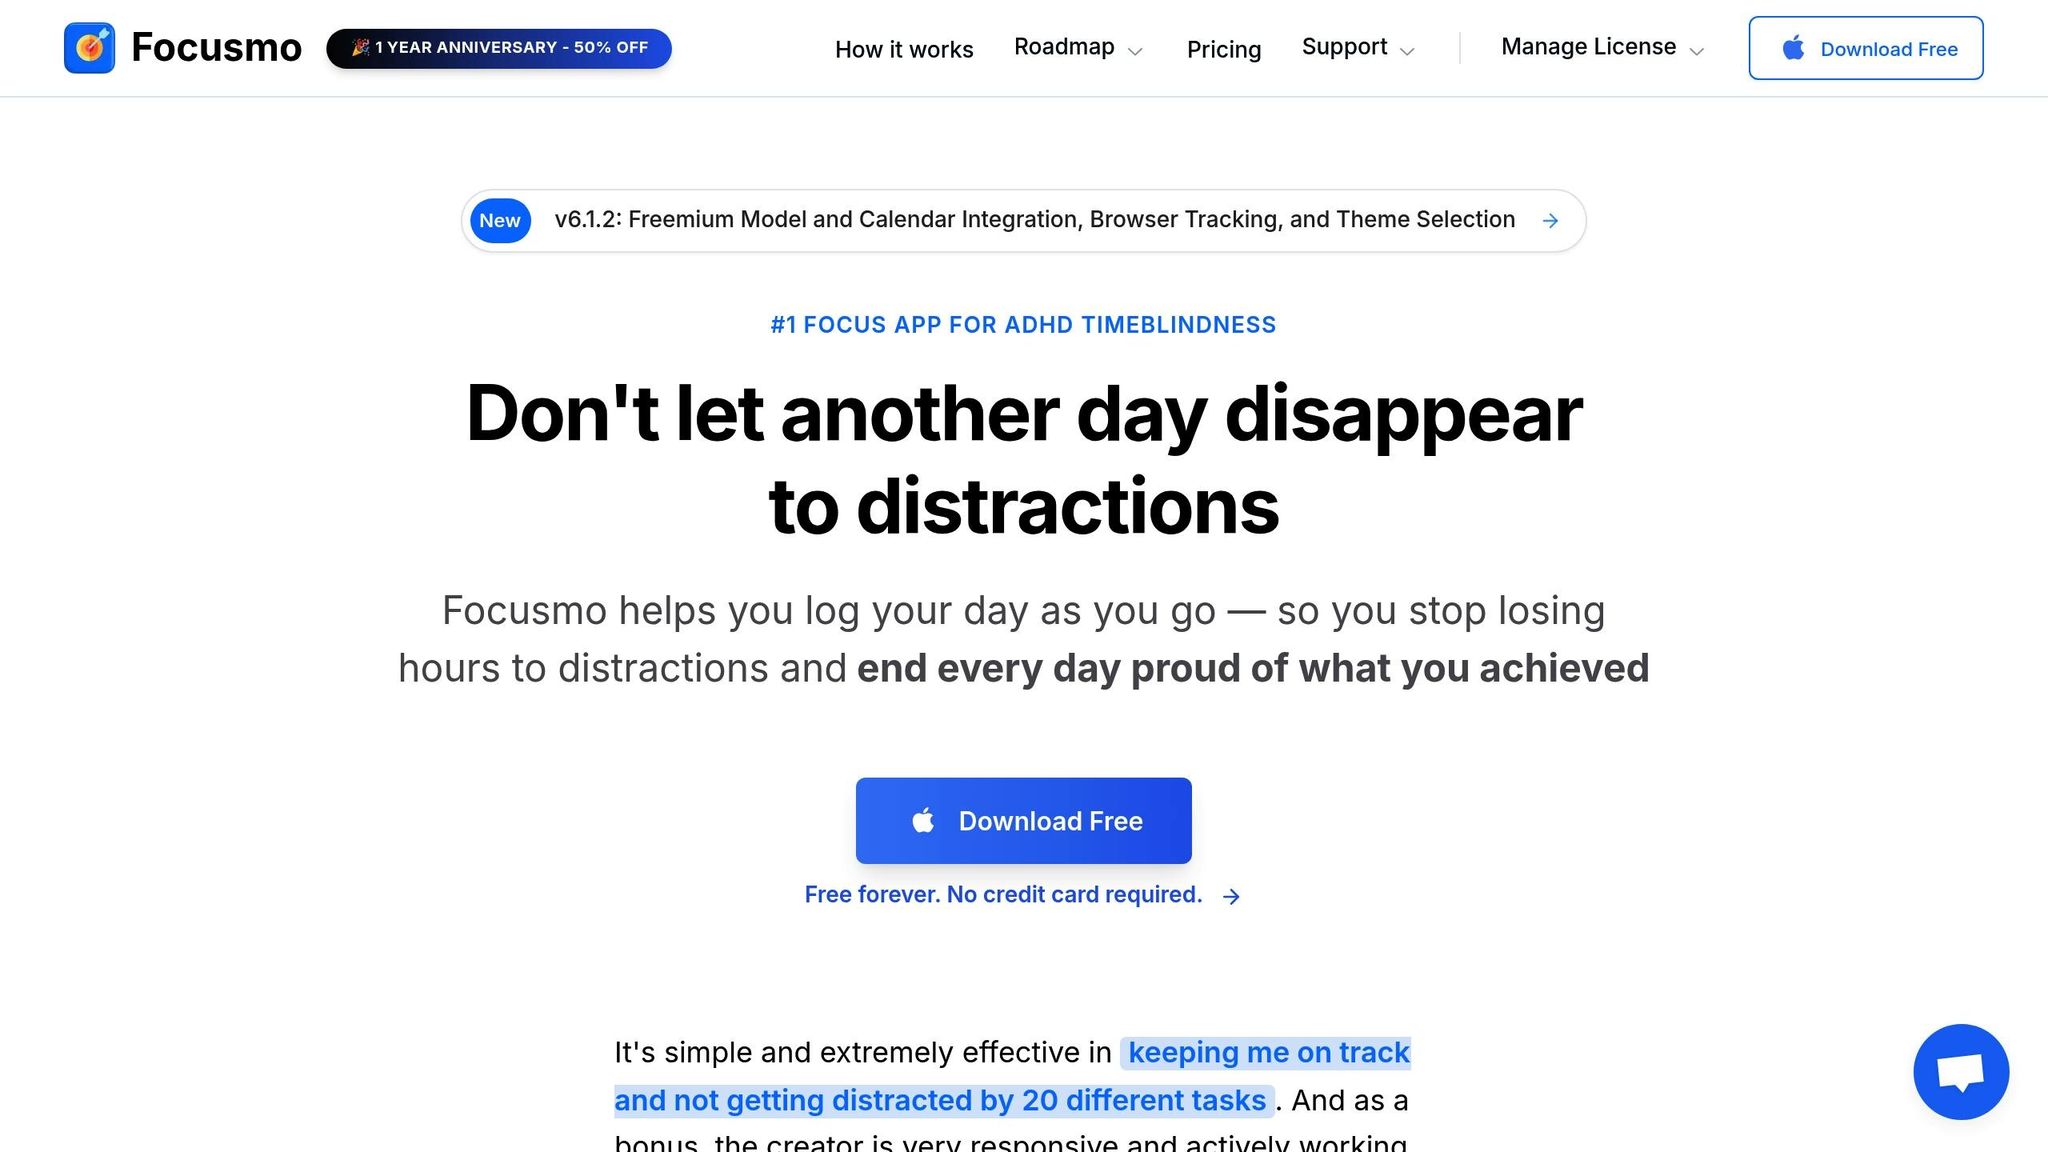
Focusmo helps you stay on track by acting as your personal accountability partner. It sends hourly reminders to log what you're working on and plan your next steps, ensuring you stay aligned with your priorities.
"It's just handy to have an accountability buddy to remind me: just do one thing, finish this one thing, do what you said you were going to do."
– Faye Campbell, motionapp.com
One standout feature is the app's floating island, which keeps your current task pinned at the top of your screen. This subtle, visual cue keeps you focused without disrupting your workflow. Aiden Thompson shares, "I have it always visible so I get reminded constantly of my current task." The blue waves in the banner even track time visually - an especially helpful tool for those who struggle with time management.
Another useful function is Focusmo's full-screen meeting alerts. These eliminate the need to constantly check the clock, letting you fully immerse yourself in deep work until a clear notification signals it's time to shift gears. For those prone to distractions, starting a focus session automatically blocks access to apps like Slack or Instagram. This addresses a common productivity pitfall: losing over 20 minutes of focus every time you switch tasks.
Focusmo is free on macOS and currently available at a 50% discount in celebration of its 1-year anniversary. You can also integrate it with macOS Focus Modes through App Based Automation, allowing Focusmo to activate your tailored "Deep Work" settings as soon as you open it.
Conclusion
Managing notifications effectively isn't just a nice-to-have - it’s essential for maintaining deep focus. This guide has walked you through using Focus modes, time-sensitive alerts, and automation triggers on macOS to help you stay in control. In a world where the average knowledge worker is interrupted every 3 minutes, these strategies are all about reclaiming your focus and creating an environment that supports uninterrupted work.
Start small: allow notifications from only a few essential apps and contacts, and expand exceptions gradually. This proactive approach is far more effective than scrambling to block distractions after they’ve already broken your concentration. After all, it takes about 23 minutes to fully regain focus once you’ve been interrupted.
If you combine these strategies with productivity tools, the results can be even better. For example, pair macOS’s Focus modes with tools like Focusmo to keep your tasks visible and stay accountable. You can also automate settings based on apps or locations and use Focus Filters to fine-tune your digital workspace. By consistently applying these methods, you’ll create a workflow that prioritizes concentration and maximizes productivity.
FAQs
How do I create custom Focus modes on my Mac to stay productive?
To set up a custom Focus mode on macOS and take control of your notifications, follow these steps:
- Open System Settings (or System Preferences if you're on an older macOS version) from the Apple menu.
- Navigate to Focus in the sidebar.
- Click the + button and select Custom to create a new Focus mode.
- Give your Focus mode a name, like “Deep Work,” and optionally customize its icon and color.
- Under People and Apps, specify which contacts or apps (e.g., Focusmo) can send you notifications while this mode is active.
- If you'd like, set up a schedule by clicking Add Schedule or Automation. This lets you activate the Focus mode automatically based on time, location, or when using specific apps.
- Once set up, you can enable your Focus mode via the Control Center or let it activate automatically according to your schedule.
This tailored approach helps you minimize distractions and stay productive, whether you're using tools like Focusmo or simply managing your day-to-day tasks.
What are time-sensitive alerts, and how can they help you stay on track?
Time-sensitive alerts are notifications that pop up at just the right moment - whether it’s a specific time or shortly before an event you’ve marked in your Calendar. On macOS, you can set these up using apps like Calendar or Clock. Simply choose the time, pick a sound, and decide if you want it to repeat. Once everything is set, the system takes care of delivering the alert exactly when you need it.
These alerts are a handy way to stay on top of your schedule. They serve as gentle nudges to keep you focused and remind you of important tasks or events, making it easier to manage your day with less stress.
How do I automate Focus modes based on location or app usage on macOS?
To set up automated Focus modes on macOS, you can use the built-in settings to activate them based on your location or app usage. Here's a quick guide:
- Open System Settings and select Focus from the sidebar.
- Pick the Focus mode you want to automate, like Work or Personal.
- Click Add Automation (or the "+" button) to create a new trigger.
From there, you can set specific triggers:
- Location-based triggers: Choose options like When I Arrive or When I Leave, then enter an address or select a saved location.
- App-based triggers: Select When I Open an App or When I Close an App, and pick the app(s) you want to link.
You can also add a time condition to control when the automation is active. Once saved, your Focus mode will turn on automatically, matching your tasks or surroundings without needing manual adjustments.